There are two ways to create a new opportunity (In-Licensing Opportunity, R&D Collaboration, Acquisition, or Out-Licensing Discussion):
- Manually, from a New form
- Through email push, using the Outlook Add-in
Almost all business objects in the Inova system, including companies, contacts, agreements, projects, and assets, are designed using form configuration, which creates or builds business objects out of a combination of fields set in a specific layout based on a standard configuration (and usually including some client-specific modifications). Once created, most business objects also have the same overall structure: An Overview tab plus various other tabs with supporting objects. Likewise, the process to create a new object from its New form is basically the same across object types--the steps below apply not just to opportunities, but to all types of business objects in the application.
Creating an opportunity from a New form
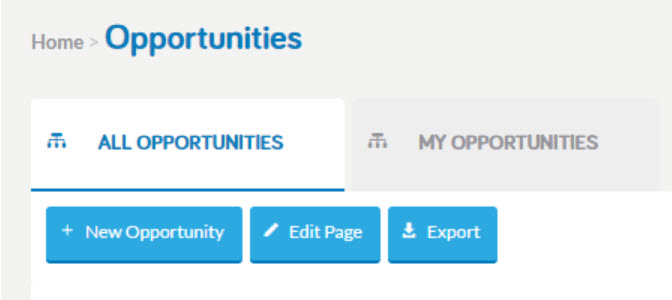
In the main menu, click Opportunities, then click New Opportunity. Or, click New Opportunity button under the Opportunities tab on your Home Page.
The new opportunity form will appear. Populate the form fields. Here are some highlights about populating any form:

- Some fields in the form are mandatory, as indicated by the red bar. You must populate these fields in order to save the opportunity, although in some cases they are pre-populated with data, e.g. the Owner field is always pre-populated with the name of the person creating the object.
- Some fields contain links to other objects or list values (in the case of the opportunity shown above, you can link it to an asset object). When you begin to type into these types of fields, the typeahead feature will search the system and display a list of matches. Click the value you want to select it.
- You may be allowed to select multiple values for a single field; in this case, the field will contain the text "Select Values..." in blue.
- Other fields only allow a single selection. In a single-value listvalue field, "Select Value..." will be displayed in black.
- If in (2) you don't find the value you're looking for, click the plus sign button to "quick create" the object.
- Quick create of a company or contact happens via a modal window.
- Quick create of other objects such as assets happens in a separate screen. The system will open a New form of that object type. You must populate at minimum the required fields on that object, save it, then save the main object. Note: If you cancel creation of the main object, the linked object will NOT be saved.
- Some fields include data entry rules that cause fields to appear, disappear, become mandatory, etc. based on how data is entered in related fields (see below).
- Date fields are populated using a date picker. Click the calendar icon to select a date.
It's not possible to type a date in manually. This enforces good data quality, as all dates are formatted the same way throughout the application.
- Additional fields can be organized in collapsible sections. Click the blue bar to expand the section and populate the fields.
- The save and cancel buttons are always displayed at the bottom of the screen, even as you scroll up and down the form.
After entering the data into the fields, click Save. The screen will refresh and display your new opportunity.
If you forget to populate a required field, the system will display a warning message in red and highlight the fields you still need to fill in.
 In most client configurations, the number of required fields on any given form is minimal.
In addition to typeahead fields, some forms include a duplicate check configuration in which, according to certain pre-defined rules (e.g. a combination of an existing asset name + existing company name), the system will display an alert that a possible duplicate record is being created. To find out more about the duplicate check feature, see this article.
Data Entry Rules
Data entry rules help enforce data entry compliance in the system. These rules are implemented by Inova as per client requirements.
With data entry rules, a trigger is defined and that trigger causes modifications in the form. Possible rules include:
- Hiding / showing fields or entire sections
- Making fields mandatory
- Making fields editable / non-editable
- Changing available values in drop-down lists
- Changing the values of a field
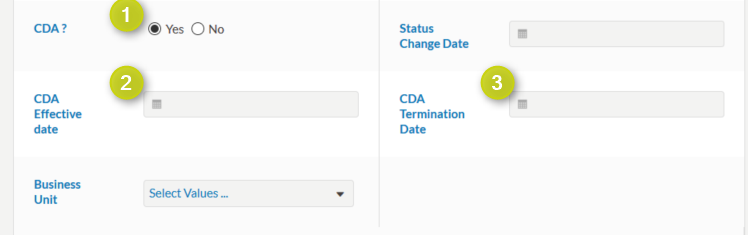
In the above example, when the user selects Yes (1) for CDA?, the system displays two new fields, CDA Effective Date (2) and CDA Termination Date. (3) Note that neither of these dates is required. The dates do not appear in the form into (1) is selected or triggered.