Reviews are the primary way for soliciting feedback from your colleagues about opportunities you are tracking in the system. With a review, you can create and re-use a template of questions and submit them to participants who provide their answers via a response page. Their responses are centralized and organized in the system, allowing you to more easily and efficiently make decisions about potential business deals and other opportunities.
Within BD, you can use reviews to get documents reviewed and approved, or to obtain input from contacts who are not system users but who are involved in the decision-making process within your department or area of expertise. The result is quicker and more efficient decision-making during the initial screening of an opportunity or as part of the due diligence process.
Alliance Managers can use reviews to create Alliance Health Checks, which they can share with partners to get input on the status of the relationship. The results of an alliance health check can be fed into a spider chart, for clients using Advanced Reporting. Click here for details.
Upon request, Inova can provide clients with a slate of pre-configured templates for this use case as well as others such as Request for Input on a Document and CDA Contamination Check. See here for details.
A review is always linked to an object (sometimes called a "container") such as an asset, project, or agreement.
Create a review
To create a review,
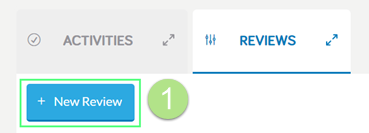
1. Click the New Review button on the Reviews tab of the object.
The New Review form will be displayed.
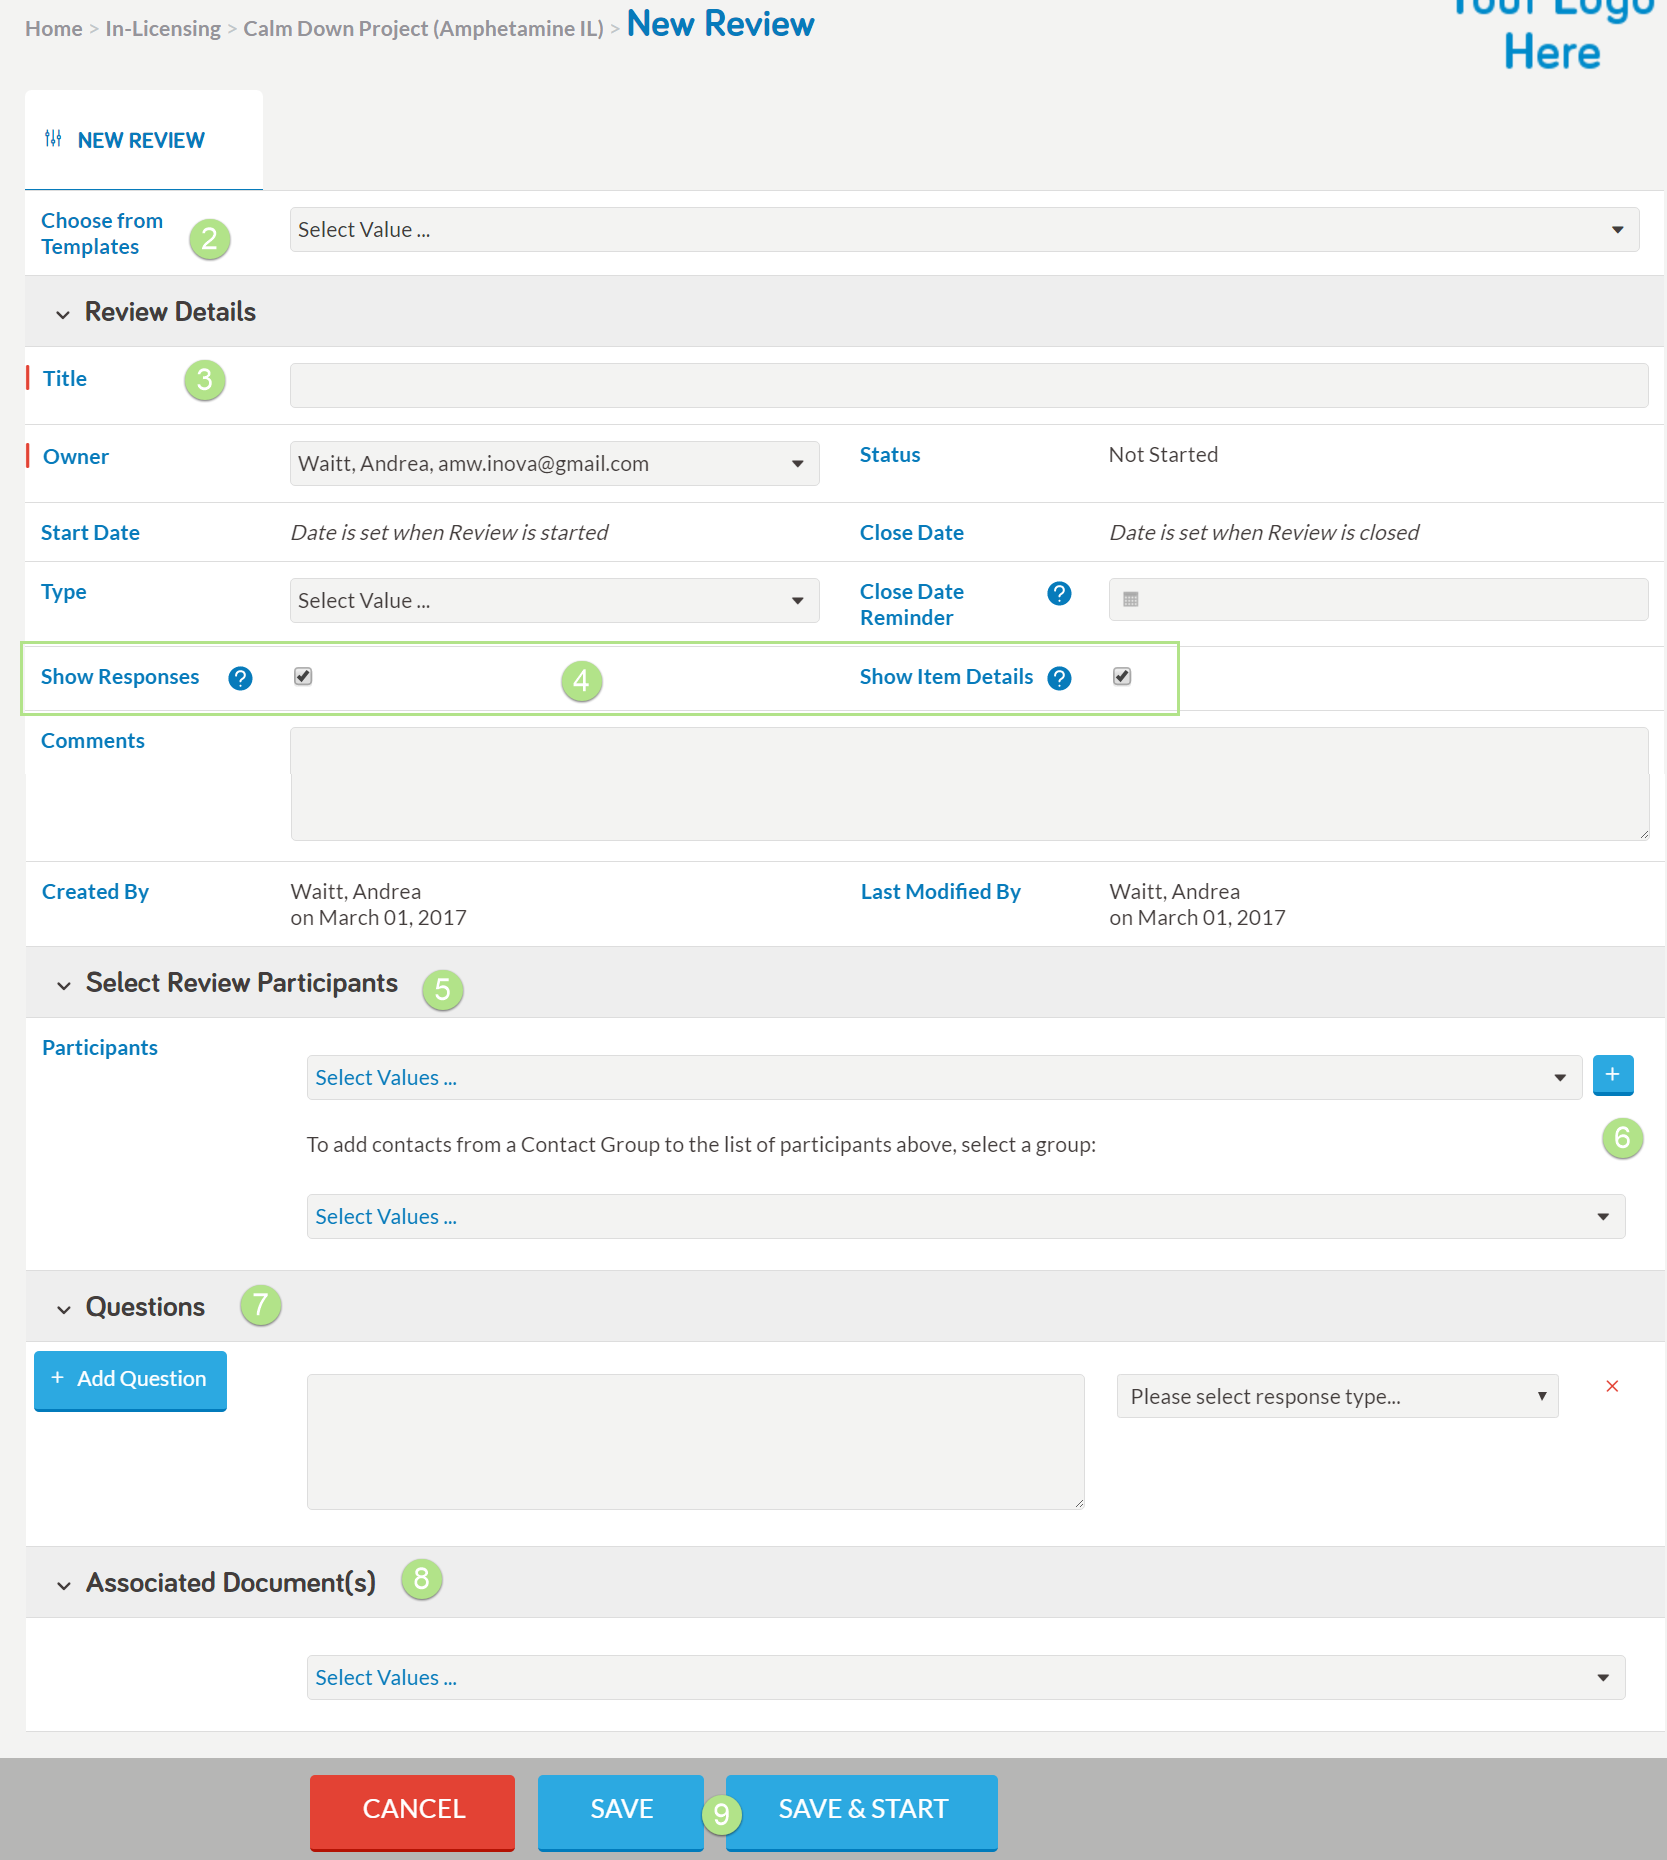
2. (Optional) From the Templates dropdown, select a review template. The screen will refresh to display the settings and questions for that template.
Templates are created by the administrator. See Reviews Administration for information on how to create review templates.
3. Enter general information about the review, starting with the Title, which is required. Note that when you select a template, this field will be automatically populated with the template title. Be sure to edit the title to better describe the objective of your review.
4. From the configuration options,
- By default, the review is set to display all answers to all review participants. To create a blind review, uncheck this box.
- By default, the review is set to display the Overview section of the objects being reviewed. To hide these details from review participants, uncheck this box.
5. Select review participants by selecting individual contacts or by selecting a contact group.
6. If the participant you want to add is not available in the list of contacts, you can add them to the database by clicking the plus button to the right of the dropdown. This will open a New Contact form. After populating the required fields, click Save.
In the New Review, the new contact will be listed under the Participants section with a yellow icon, as shown below:

Note: The system will display several visual cues to alert you when an external contact has been added to the review.
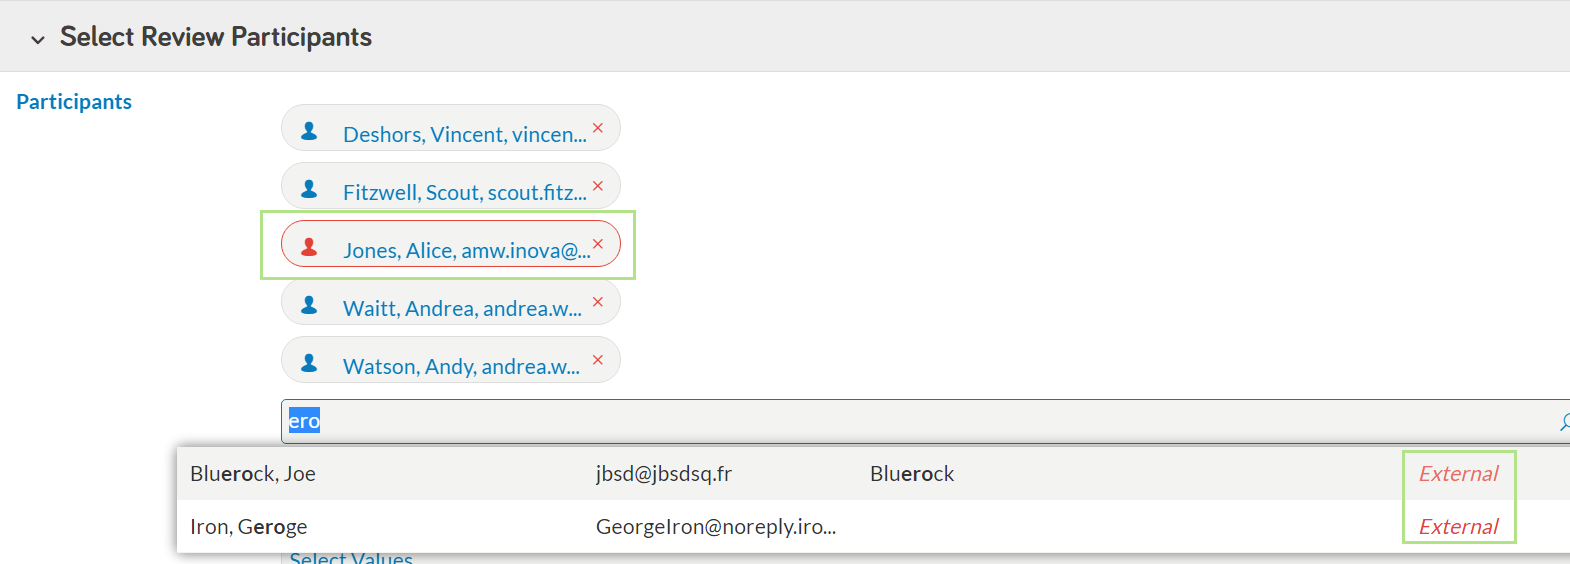
- When searching for contacts, the type is listed in the dropdown and External will appear in red font.
- Selected external contacts have a red border.
- When you hover your cursor over the selected contact, the type is displayed in the mouseover text.
- A warning message will also appear next to the Save buttons at the bottom of the form:

7. Create as many questions as needed and select the answer type for each.
Note that if you are using a review template, this section will be pre-populated. You can modify these questions and answer types or add additional ones as needed.
8. As needed, attach documents to the review.
To be attached to a review, the documents must already be uploaded into the application in the document manager of the container object. If the name of the file you want to attach isn't in the list--or if the field itself does not appear at all in the review form--then the file hasn't been uploaded yet. Save the review, upload the document to the document manager of the container, then edit the review to attach it.
Document Security and Reviews
You should only attach a document to a review that you know can be shared with the participants and their colleagues, especially when including external contacts in the review.
When in view mode, the review will highlight restricted or CDA-covered documents as shown in the screenshot:
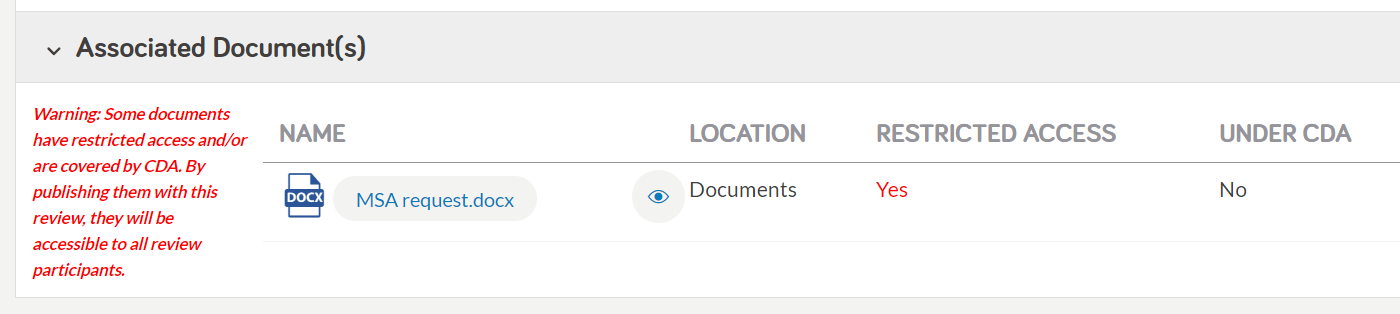
- If a document attached to the review is restricted, the system will indicate it with a message next to the file and in the Restricted column.
- If the document is flagged as "Covered by CDA," the system will display that in the Under CDA column.
When the review is in edit mode, CDA-covered documents will be highlighted with red, as shown below:
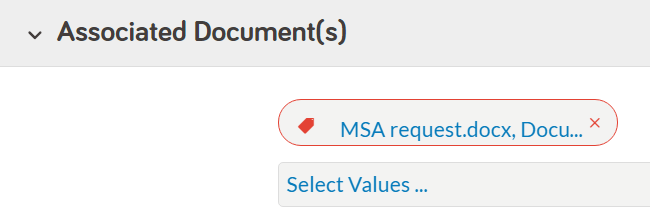
When you hover your cursor over the document, the restriction details are displayed in the mouseover text.
Save and Start
After you've entered all the review details, you have a couple of options:
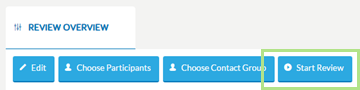
1. If you're not ready to start the review yet, click Save. You can return to the review anytime and make changes. Once you're ready to start, in the Review Overview tab, click Start Review:
2. Or, you can click Save & Start.

Once you start a Review:
- The system will automatically generate and send via email a review request to each participant. The review request will have content specific to the user's type, external or internal. The content of these emails can be modified by the system administrator.
- If the system is unable to send the email, an error message will appear in the Request Email Status column in the Participation tab.
- For anyone who is both a system user and a participant of the review, the Reply link will appear next to the In Progress status once the review is started. The review will also be listed in the My Reviews tab on the home page.